The joy of life can be preserved, tales told, and shared with others via photographs. Whether you're a new parent seeking the most acceptable methods to document your child's development in pictures, an Instagrammer searching for fresh inspiration, or a traveller preparing to visit a beautiful destination, you can use these tips. Taking up photography might be done so for a variety of reasons. However, a camera can seem daunting if you're not used to using one, mainly a digital single-lens reflex (DSLR) or a smartphone. If that's the case, our photography primer has you covered. We'll walk you through the fundamentals of using a camera and taking photographs and share some of our best advice for newbies in the field.
The incredible diversity of modern photography gear is genuinely remarkable. Each day brings a new crop of cameras with larger sensors and more powerful processors. More and better equipment is something that everyone wants. Nevertheless, keep in mind that one's camera does not determine one's photographic abilities. You must be able to operate the machinery to realise the vision you have in your mind. One of the most fundamental pieces of advice for photographers is also one of the trickiest to put into practice. Now is the time to start snapping pictures with your smartphone, ordinary camera, or DSLR.
A beginner or hobbyist photographer will benefit most from a compact DSLR (Digital Single Lens Reflex) camera. Due to their low cost, portability, manageability, and clarity.
You should read the manual for your camera and learn how it operates before shooting any images. It is essential to familiarise yourself with the functions and controls of your camera, be it a point-and-shoot, smartphone, or DSLR.
Turning off the auto-flash, adjusting the shutter speed or aperture, or mastering the zoom feature can significantly impact the quality of your final images. The instruction booklet with your camera is your finest resource for learning the ins and outs. However, check out our guide if you want to know the fundamentals of smartphone photography.
Flat lay banner with copy space featuring essential photography tools, including a camera and touch screen devices, shown on a wooden desktop.
Camera Features For Beginners
- Use the viewfinder (and the grid mode) to plan the composition of your shots carefully. If you activate the grid mode, the screen will be laid out in a grid that can be used for organising purposes.
- When taking photos, it's best to avoid zooming in, as doing so degrades image quality. However, knowing when and how to use your camera's zoom feature is essential.
- Most cameras include an autofocus mode, but switching to the manual is essential once you've mastered photography fundamentals. You'll be able to create more aesthetically pleasing photographs as a result.
- To prevent images from turning out with unintended hues, it's essential to adjust the colour balance settings based on the available light.
- Aperture: Vary the size of your gap to manage the amount of light entering your camera's sensor.
- When the shutter speed is too quick, the image will be too dark, and when it is too slow, the image will be fuzzy. Make an effort to strike a balance.
- While most photographers prefer to use artificial lighting, you should still familiarise yourself with the fundamentals of your camera's flash.
- Manual Mode (and other modes): Modes including sport, portrait, landscape, and more let you take pictures with their settings already optimised for the subject. Taking your camera off automatic mode will allow you to control your photos more creatively.
- Before taking a photo, you can control the exposure and white balance to get the desired effect.
- When taking images, the amount of grain you see depends on the ISO setting on your camera.
- If you look at your camera's display, you'll see a histogram. Be sure that the values are set how you want them before you start shooting.
- How much room you have on your memory cards and how far forwards you can edit your photographs after the shooting are both affected by whether you shoot in RAW or JPEG format. Pack extra memory cards if you intend to shoot in RAW, the more critical file format.
Photography Equipment For Beginners
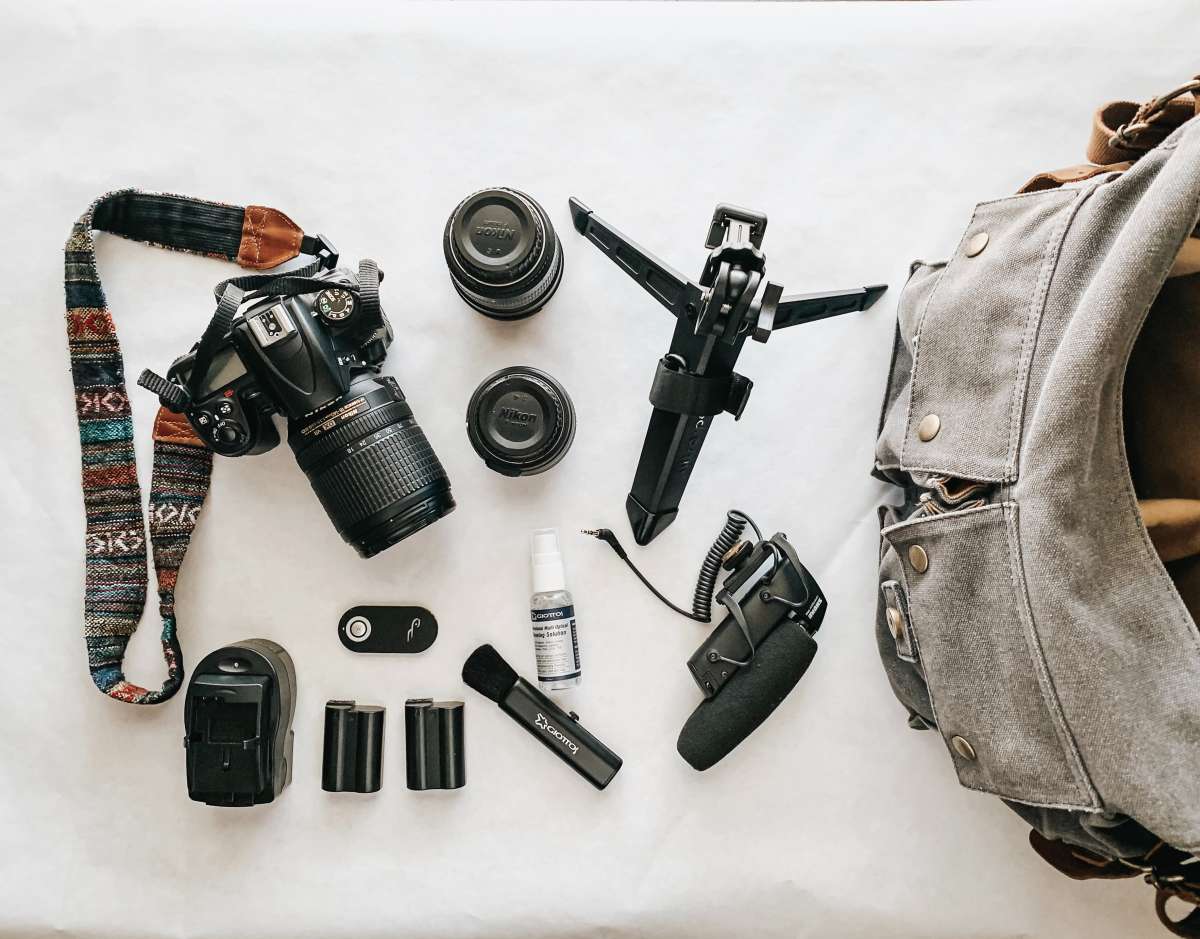
- The "body" of your camera (or the camera on your phone) should be able to accommodate the dimensions of the photographs you intend to capture and provide any additional functions you consider necessary. If, for instance, you plan on fiddling with the aperture or the shutter speed of your shot, a point-and-shoot may not be the best choice.
- Lens (and case): Lenses come in a wide variety of sizes and are one of the most significant long-term purchases you'll make because they outlast camera bodies. Take your time finding a lens that has the focal length and additional features you need.
- The ideal tripod would be substantial, dependable, and lightweight. For photographers whose hands tend to shake, this is a considerable investment.
- Light from Without: Light from without can be used to eliminate unwanted shadows around your subject. For portrait photographers, this makes them an excellent long-term investment.
- Finding a trustworthy external hard drive to save your images is crucial. Please don't put it off until after you've lost everything.
- Keep a minimum of two memory cards in your camera bag. You won't have to go back and remove shots to make room for more to be taken if your shooting goes on longer than intended.
- Bag/Carrying Equipment: Make sure your bag and carrying equipment aren't too heavy to tote about.
- Lens and camera cleaning accessories: The quality of your photos will suffer if the lens is dirty. In the worst situation, dirt can scratch your lens. Therefore it's essential always to have a way to clean it on hand.
- Rechargeable batteries: having a supply of batteries on hand allows you to continue shooting for much longer, making them perfect for road trips.
11 Things Beginners Should Know About Photography
You may be just starting, but you know you want to take stunning pictures.
Understanding that mastery of a new skill takes time is not always easy to keep in mind. It's tempting to imagine that if you only buy the latest piece of equipment or learn the processing secret that your favourite photographers must know, your photos would suddenly become amazing after being bombarded with beautiful images online and elsewhere.
There are no shortcuts to becoming the kind of photographer you want to be, but with dedication, the understanding that your development can occur at your own pace, and the advice provided here, you can get there.
There’s a Lot to Learn. Take it One Step at a Time.
You can become a skilled photographer if you put in the time and effort to study the craft. There is a lot to learn about photography, including how to use f-stops, ISOs, exposure, focus modes, white balance, light, composition, focal length, how different lenses affect your shots, how to pose for portraits, and how to express yourself creatively and uniquely via your photographs.
It's easy to feel overwhelmed by the length of the list, but if you break it down, you'll see that it's pretty manageable. Please select the most critical task and give it your full attention. If focusing is your initial step, familiarise yourself as much as possible with your camera's manual to get the most out of it. Focusing on how ISO, f-stop, and shutter speed interact to affect exposure is the first step toward learning how to capture well-exposed photographs.
Divide it into smaller, more doable tasks, and after you've got one down pat, move on to the next. If you try to learn everything at once, you can become frustrated and put your camera back on automatic, missing out on a fun, creative opportunity.
I Was Shooting in Manual Matters.
When they refer to "shooting in manual," most photographers indicate that they are utilising manual exposure settings, but they are not necessarily using manual focus. When they were initially getting started with photography, then read up on the principles of the exposure triangle, set my camera to aperture priority mode, and figured that as long as They were in control of the ISO and f-stop, We could safely let the camera decide on the shutter speed.
In retrospect, there are two main reasons why they should have known better. To begin with, because the camera wasn't advanced enough, They frequently took blurry photos because the shutter speed was too sluggish. The second, arguably more crucial, is that setting the exposure metre on your camera to 0 doesn't always result in adequately exposed photos. If you're in a light-coloured environment and your camera's metre is set to middle grey, you may need to overexpose slightly to attain the correct exposure.
When placed against a black backdrop, however, the opposite is true. Learn more by putting your camera into manual exposure mode, obtaining a grey card, and practising with it. There are many different techniques for finding the optimal exposure, and you may have heard of the Zone Method or "exposing to the right." Even so, the most critical point to remember is that while your camera's metre can serve as a general guide, setting the metre to middle grey or zero may not always result in the best exposure.
It's also possible that you'll need to over- or underexpose some elements of the scene to get the direction suitable for the subject(s) of your photograph (in the case of a portrait, for example). It's not ideal to have your camera decide what's most important. Therefore it's up to you to make that call.
Don’t Fear High Iso’s.
The second common blunder made as a beginner was not using a high enough ISO. We had read that using a higher ISO resulted in a noisier picture; therefore, We were afraid to use one. But We didn't know that till now: a little bit of noise is far preferable to an image that's out of focus due to a slow shutter time.
In addition, even with a low-end camera, the noise shouldn't be too noticeable if the idea is correctly exposed or exposed to the right and possibly a little overexposed (though not blown). You can use natural light indoors, artificial light from a lamp or iPad, or the final rays of sunlight outside if you increase the exposure as much as your camera will allow.
You Don’t Need the Latest and Greatest Equipment to Make Beautiful Images.
It's easy for a newbie to believe that upgrading to a better camera or the lens everyone is raving about will miraculously improve their images. For better or worse, the system does not work that way. It takes time, effort, and research to improve your photographic talents. We thought the first camera had outgrown it, so we bought a better one. In retrospect, we realise that the exponential growth that occurred with the second camera was not caused by the camera at all.
The images We take on vacation now that We know how to get the most out of my Nikon D40 completely blow me away. To make consistent progress towards becoming a proficient photographer, you may need a low-cost DSLR and a prime lens well suited to your shooting style. We were admitted to CMPro with a portfolio almost wholly comprised of images taken with a crop sensor.
We were later made aware of others who were similarly successful while utilising only affordable equipment throughout their application. Once you've laid the groundwork, it's up to you to push things as far as they can go.
Study the Light.
After you've mastered the fundamentals of exposure and focus, you should seriously consider how to read the light. A great light may transform an image from ordinary to extraordinary. Light can be learned in a lesson, via a book, or by becoming conscious of the light around you as you go about your day.
Consider how light falls on people and things as you go about your day and how people are lighted in paintings and on television. It becomes challenging to quit reading in the morning. Soon, you might find yourself hurrying to grab your camera when you see how the light is hitting your child as they play in the front hall, or you might come across a breathtaking sunset.
Focus on Getting it Right in the Camera Before Spending All Your Time Worrying About Processing Your Images.
While familiarising yourself with the fundamentals of an editing programme or two is essential, focusing on improving your photography skills in-camera should come first. If you keep the original "straight out of the camera" (SOOC) file, you can reprocess old photos whenever you choose, no matter how much processing knowledge you've gained.
Even yet, you can't do much about your infant's vision being impaired because of a lack of foundational knowledge. Additionally, shooting in RAW provides a great deal of editing leeway later on. Having a high-quality SOOC also frees up your processing time, allowing you to focus on bringing your idea to life instead of trying to salvage an otherwise subpar image. RAW may sound intimidating, but please don't let its name fool you.
Because your camera isn't doing anything for you, you'll need to do some basic editing on every photo, but you'll also have a lot of creative freedom with the final product. To make a significant adjustment to the lighting, that's fine. Was there a shift in lighting conditions during which you were unable to adjust the white balance? If you shoot in RAW, you can fix many problems. In digital photography, RAW files serve as the "negative." It provides a solid foundation on which to build the image so that it accurately reflects your intentions.
Take the Time to Understand How to Post-Process by Hand.
Knowing how to edit an image by hand is the best way to bring out your vision in all your pictures, not just the ones your favourite preset works well on. This is true even if you enjoy using actions and presets. Also, suppose you aren't familiar with the ins and outs of your editing software and what constitutes a well-edited image. In that case, it's easy to go overboard when using only actions and presets.
In addition, before you get into post-processing, ensure you have a firm grasp of white balance and skin tones. Even the best lighting and gear won't save your photos from being amateurish if your white balance is way off. While learning, you might not see the flaws in your work, but later on, when you look back, you might wonder how on earth you could have thought that orange baby looked nice.
Calibrated displays are great for training the eye. If this isn't something that comes easily to you, don't stress about it. Practice makes perfect, so keep looking at your photos and those of others. To better observe details that may be missed on the computer, printing images is a good idea.
Learn the Rules So You Can Break Them With Purpose.
They sometimes see people who think that their style should include:
White balance that is off.
- Compositions that are highly unique but maybe not very good.
- Other things that break the conventional rules of photography.
It’s usually easy to separate those who have internalised the rules and are breaking them on purpose to convey their message and those whose eyes aren’t developed enough to know how to break the rules to communicate their vision to their viewers. They break the rules simply because they don’t know them. Be one who knows the rules so well they can break them to your heart’s content.
Slumps Are Normal.
Someday you may realise that while you’ve been learning a lot, your work seems to be getting worse. Chances are you’re not getting worse. It’s more a matter of noticing things you didn’t see when you started. If you need to, go back and look at your work from a couple of months ago, and that should hopefully give you some perspective that you are improving, even if it’s easier to notice the less-than-perfect aspects of your images now. That being said, when you initially switch to manual, you may have a time when your work isn’t as good as when you were shooting on one of the auto modes. Push through that barrier, and soon your images will be way better than they ever were before.
Don’t think that slumps are something that only happens to beginners. Once you’ve gotten to the point where other people think your work is good or excellent, you may still have times when you aren’t feeling great about any of your latest creations. Slumps come with the process for many artists. You’ll have to figure out what works for you — shooting through the slump, putting the camera away for a while, coming up with a personal project, etc. — but know that you are not alone! Almost all of us feel that way sometimes.
Not Every Image Needs to Be a Work of Art.
Once you know how to take a great image, it can be easy to fall into the trap of not taking any picture in less than ideal conditions. Don’t fall into this trap. You will still want to remember the birthdays, vacations, trips to the playground and all the minor everyday events, even if the light is less than ideal or the background is busier than Times Square. Yes, some people can take these less-than-ideal circumstances and still create amazing images, but even if you are not one of them, don’t let the quest for beautiful photographs stop you from documenting the important people and milestones along the way!
Enjoy the Journey.
They've been at this for a long time, and one thing they learned is that growing your photography is a journey without a finish line. If you continue to create, you will never arrive at a point where you know everything or have no room for improvement. There is always something else to learn. And no matter how good you get, someone will always be better than you. Don’t let comparison or the quest for perfection steal your joy.
FAQs About Photographer
This is most likely the first rule of composition that any beginning photographer will learn. And this is for an excellent reason: not only is it easy, but it is also effective.
The fundamental idea behind this is to cut the image captured by your camera into thirds. The picture's composition can work better by positioning significant components along these lines.